How to Enter a Variable Product (Beginner Tutorial)
Variable products are items that come in different variations, such as sizes, colors, or any other attributes. For example, a t-shirt that comes in small, medium, and large, and in red, blue, or green.
Below are step-by-step instructions to add a variable product:

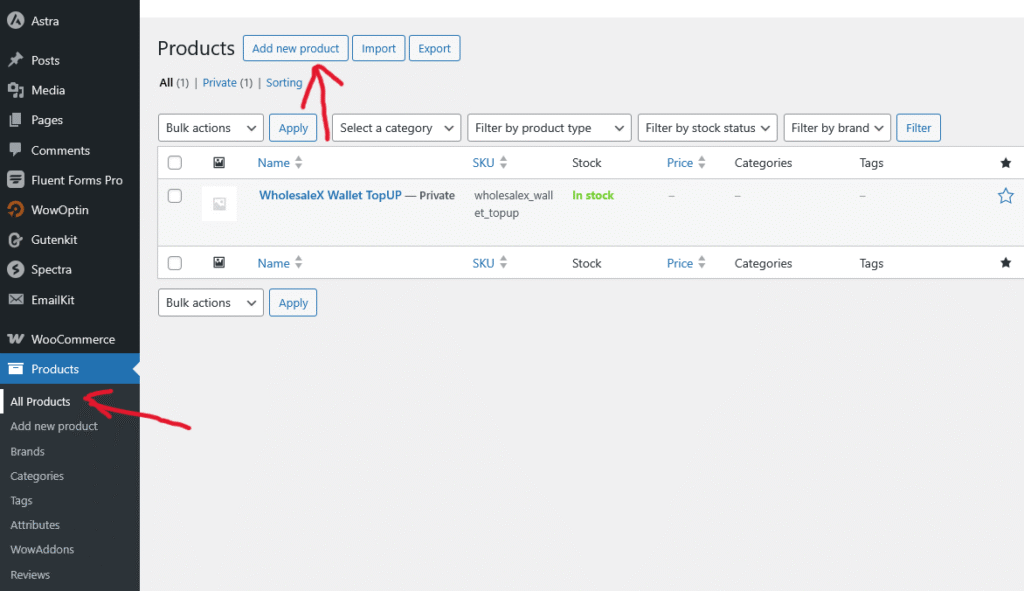
1. Add a New Product
- Go to your Dashboard.
- Click on Products > Add New.
2. Enter Basic Product Details
- Product Name: Type the name of your product (e.g., “Classic T-Shirt”).
- Description: Add a full description in the main text area.
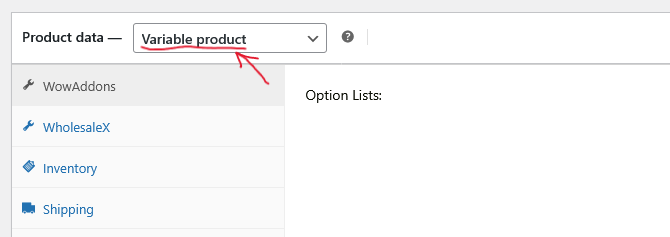
3. Set the Product Data Type
- Scroll down to the Product Data section.
- From the dropdown menu at the top, select Variable product.
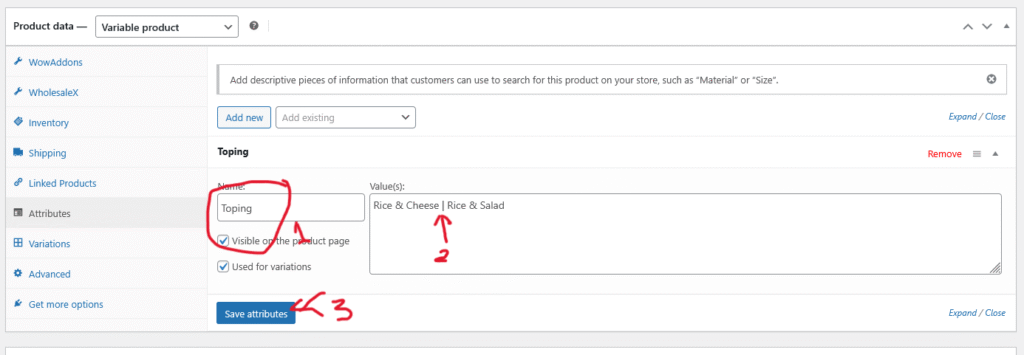
4. Add Attributes
Attributes define what variations you want (like size or color).
- Go to the Attributes tab within Product Data.
- Click Add to create a new attribute (e.g., Size or Color).
- Enter the values separated by “|” (example: Small | Medium | Large).
- Check the box Used for variations.
- Click Save attributes.
Repeat for additional attributes if needed.

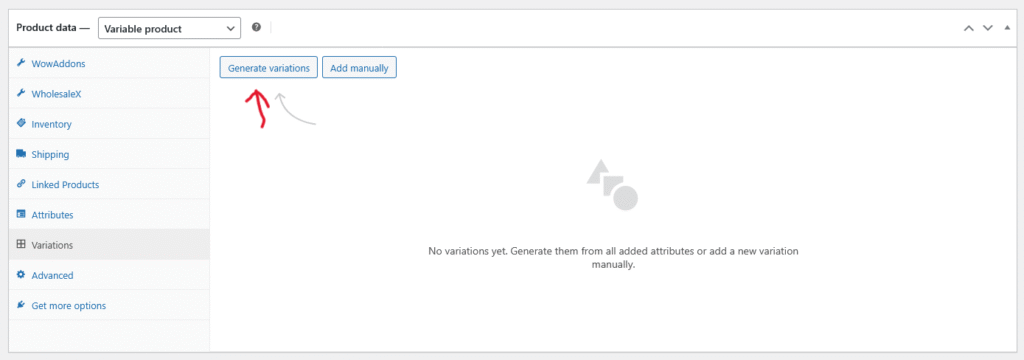
5. Create Variations
- Switch to the Variations tab.
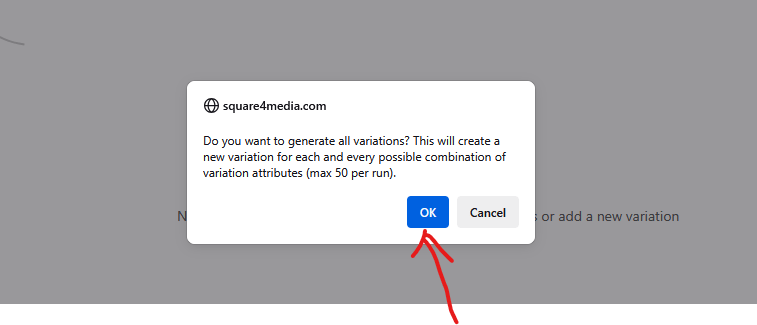
- Click the dropdown and select Create variations from all attributes.
- Click Go. Confirm when asked; WooCommerce will generate every possible combination.

6. Configure Each Variation
For each variation (like Red/Small), click the row to expand options:
- Price: Set a Regular Price (required).
- Stock status: In-stock or out-of-stock.
- SKU: Add if you use SKU numbers.
- Image: Add an image specific to that variation (optional).
Repeat for each variation as needed.
7. Add Product Images
- Product Image: This is the main image shown in your store.
- Product Gallery: Add extra images if you want.
8. Publish
Double-check everything, then click Publish (or Update if editing).
Tips
- You can edit or remove variations at any time.
- Use clear names for attributes (e.g., “Material” instead of “Option 1”).
- Always set prices for each variation.
